Have you tried to change the login screen in Windows 7?. You may faced lot of problems by using third party tools. I found a way to change the login screen background without using a third party tool. In this procedure you have to change windows 7 registry.
NOTE : Backup your registry before change any thing. this step is a must, in case of fatal error we can restore registry to the previous state.
Follow these steps
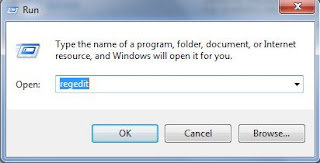
- Open windows registry editor. To open registry editor, open run type "regedit" and press enter
- Backup registry To backup registry click file from the menu and select Export

- Navigate to the following key HKEY_LOCAL_MACHINE\Software\Windows\CurrentVersion\Authentication\LogonUI\Backgroundfind the key "OEMBackground"
 If the key OEMBackground is not there create a new key named OEMBackground tocreate new key right click on the empty space in the right pane and create a new DWORD key.
- Change "Value data" of the key OEMBackground
Right click on the key OEMBackground and click on the modify.
 set value to 1 and click OK.
- Now navigate to the Windows folder and open the folder System32\oobenow navigate into the folder "Info", (if its not there create a new folder and named is as "Info"). then navigate or create a folder named "backgrounds" in the folder "Info".
- Copy the image which you like most to the folder "backgrounds" and rename it as "backgroundDefault".size of the image should be the screen resolution (otherwise it will get stretch) and it should be in the format JPEG .
NOTE : maximum size of the image should 256KB. Restart the computer and enjoy your most favorite image as the login screen.
Save the backup file in a convenient location.
Close the registry editor.
Enjoy Windows


No comments:
Post a Comment